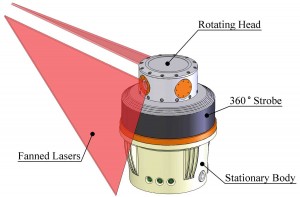
This paper details work carried out to verify the dimensional measurement performance of the Indoor GPS (iGPS) system; a network of Rotary-Laser Automatic Theodolites (R-LATs). Initially tests were carried out to determine the angular uncertainties on an individual R-LAT transmitter- receiver pair. A method is presented of determining the uncertainty of dimensional measurement for a three dimensional coordinate measurement machine. An experimental procedure was developed to compare three dimensional coordinate measurements with calibrated reference points. The reference standard used to calibrate these reference points was a fringe counting interferometer with the multilateration technique employed to establish three dimensional coordinates. This is an extension of the established technique of comparing measured lengths with calibrated lengths. The method was found to be practical and able to establish that the expanded uncertainty of the basic iGPS system was approximately 1 mm at a 95% confidence level. Further tests carried out on a highly optimized version of the iGPS system have shown that the coordinate uncertainty can be reduced to 0.25 mm at a 95% confidence level.
Download: 
Authors
J E Muelaner1, Z Wang1, J Jamshidi1, P G Maropoulos1,
A R Mileham1, E B Hughes2, and A B Forbes2
1: Department of Mechanical Engineering, University of Bath, Bath, UK
2: National Physical Laboratory, Teddington, UK
Published in
The Journal of Intelligent Manufacturing, 2012
Volume and page number information
23(6), p. 2323-2331
Leave a Reply