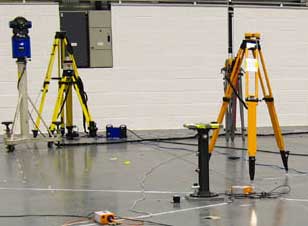
This report presents the results of testing of the Metris iGPS system performed by the National Physical Laboratory (NPL) and the University of Bath (UoB), with the assistance of Metris, and Airbus at Airbus, Broughton in March 2008. The aim of the test was to determine the performance capability of the iGPS coordinate metrology system by comparison with a reference measurement system based on multilateration implemented using laser trackers. A network of reference points was created using SMR nests fixed to the ground and above ground level on various stands. The reference points were spread out within the measurement volume of approximately 10 m × 10 m × 2 m. The coordinates of each reference point were determined by the laser tracker survey using multilateration. The expanded uncertainty (k=2) in the relative position of these reference coordinates was estimated to be of the order of 10 μm in x, y and z. A comparison between the iGPS system and the reference system showed that for the test setup, the iGPS system was able to determine lengths up to 12 m with an uncertainty of 170 μm (k=2) and coordinates with an uncertainty of 120 μm in x and y and 190 μm in z (k=2).
Download: 
Notes
These tests were carried out using a state of the art iGPS system,
which was operated and continually monitored by a team of engineers from the
system manufacturer (Metris). This network consisted of 8 transmitters and
12 monument sensors. The full use of all transmitters and monuments therefore
required over 100 lines of sight to be simultaneously maintained while
measurements were being taken.
Authors
Ben Hughes, Alistair Forbes, Wenjuan Sun
The National Physical Laboratory
P G Maropoulos, J E Muelaner, J Jamshidi, Z Wang
The University of Bath
Published by
Queen’s Copyright Printer and Controller of HMSO
ISSN
ISSN 1754-2987

Leave a Reply