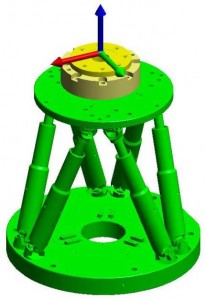
Aerospace manufacturers typically use monolithic steel fixtures to control the form of assemblies; this tooling is very expensive to manufacture, has long lead times and has little ability to accommodate product variation and design changes. Traditionally, the tool setting and recertification process is manual and time consuming, monolithic structures are required in order to maintain the tooling tolerances for multiple years without recertification. As part of a growing requirement to speed up tool-setting procedures this report explores a coupon study of live fixturing; that is, automated: fixture setting, correction and measurement. The study aims to use a measurement instrument to control the position of an actuated tooling flag, the flag will automatically move until the Key Characteristic (KC) of the part/assembly is within tolerance of its nominal position. This paper updates developments with the Metrology Enhanced Tooling for Aerospace (META) Framework which interfaces multiple metrology technologies with the tooling, components, workers and automation. This will allow rapid or even real-time fixture re-certification with improved product verification leading to a reduced risk of product non-conformance and increased fixture utilization while facilitating flexible fixtures.
Authors
O C Martin1, J E Muelaner1, Z Wang1,
A Kayani2, D Tomlinson2, P G Maropoulos1, P Helgasson3
1 – Department of Mechanical Engineering, The University of Bath, Bath, UK
2 – Airbus UK
3 – Delfoi
Presented at
Proceedings of DET2011
7th International Conference on Digital Enterprise Technology
Athens, Greece
28-30 September 2011
Download
References
- Burley G, Odi R, Naing S, Williamson A and Corbett J,
“Jigless aerospace manufacture – The enabling
technologies”, in Aerospace Manufacturing
Technology Conference & Exposition. Bellevue,
Washington: Society of Automotive Engineers, 1999 - Durrantwhyte HF, “Sensor models and multisensor
integration”, International Journal of Robotics
Research, Vol. 7, No. 6, 1988, pp 97-113 - Gooch R, “Optical metrology in manufacturing
automation”, Sensor Review, Vol. 18, No. 2, 1998, pp
81-87 - Huang Y, Lan Y, Hoffmann WC and Lacey RE,
“Multisensor Data Fusion for High Quality Data
Analysis and Processing in Measurement and
Instrumentation”, Journal of Bionic Engineering, Vol
4, No. 1, 2007, pp 53-62 - Jayaweera N and Webb P, “Metrology-assisted robotic
processing of aerospace applications”, International
Journal of Computer Integrated Manufacturing, Vol.
23, No. 3, 2010, pp 283-296 - Maropoulos PG, Guo Y, Jamshidi J and Cai B, “Large
volume metrology process models: A framework for
integrating measurement with assembly planning”,
CIRP Annals – Manufacturing Technology, Vol. 57,
No. 1, 2008, pp 477-480 - Martin OC, Muelaner JE, Tomlinson D, Kayani A and
Maropoulos PG, “Metrology Enhanced Tooling for
Aerospace (META) Framework”, Proceedings of the
36th International MATADOR Conference,
Manchester, 2010, pp 363-366 - Rooks B, “Assembly in aerospace features at IEE
seminar”, Assembly Automation, Vol. 25, No. 2, 2005, pp 108-111 - Saadat M and Cretin C, “Dimensional variations during
Airbus wing assembly” Assembly Automation, Vol.
22, No. 3, 2002, pp 270-279 - Weckenmann A, Jiang X, Sommer KD, Neuschaefer-
Rube U, Seewig J, Shaw L and Estler T, “Multisensor
data fusion in dimensional metrology”, CIRP Annals –
Manufacturing Technology, Vol. 58, No. 2, 2009, pp
701-721


Leave a Reply